Back to TheWorxHub for Senior Living Main Menu
Creating an Asset from a Model
Once you have created an asset model that has been approved, you can create assets from the model that will contain all of the relevant details added to the model, ensuring consistent and accurate data is tracked for each asset.
How to Create an Asset from the Model Form
- Click on Assets from the navigation menu and then select Model List.
- Use the filters across the top of the model dashboard and the search bar to locate the model you would like to use to create an asset.
- Click on the name of the model.
- Click on More and then select Add Asset.
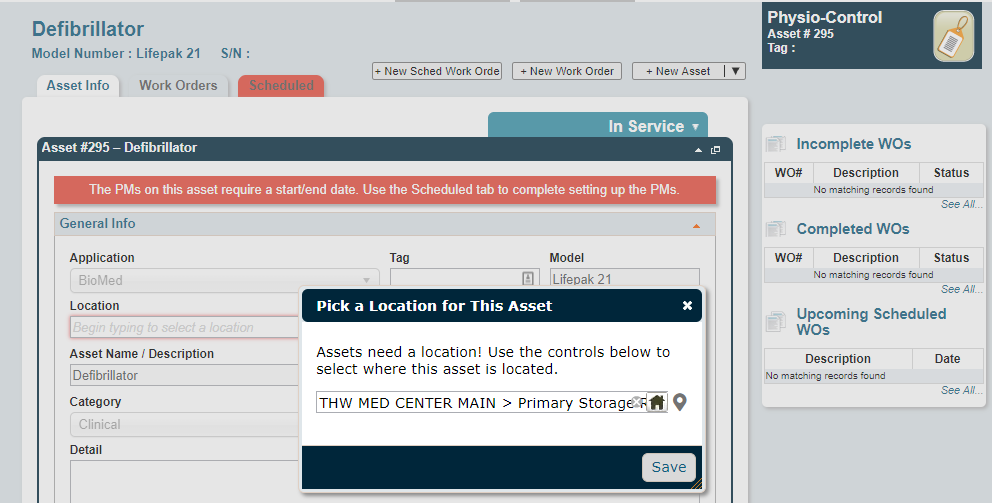
- If you have access to the Space Management application, click the map pin icon (
 ) to select a location from a floor plan drawing. *Note: If you do not currently have this application, please contact your Sales Representative or Client Services for more information.
 - Click Save.
Scheduled Work
If you added PM schedules to the model that this asset is created from, you must define the start and end date for those schedules.
- Click on the Scheduled tab.
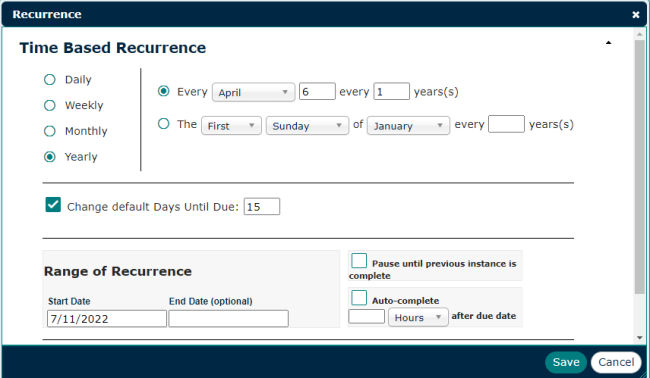
- Click on the Sched# of the schedule you would like to define. The Recurrence window will open automatically.
- Enter the Start Date, or select it from the calendar. *Note: Regardless of the Start Date for the PM schedule, the first scheduled work order will generate on the next defined occurrence date. For example, if the Start Date of the PM schedule is 01/01/2020, but the PM schedule is set to recur every March 30th, no scheduled work order will generate until March 30th.
- Enter an End Date, or select it from the calendar, if needed.
- Click Save.
How to Create an Asset from the Model Dashboard
- Click on Asset Models from the navigation menu.
- Use the filters across the top of the model dashboard and the search bar to locate the model you would like to use to create an asset.
- Click Add Asset on the model. This will open the asset form.
- In the window that appears, use the Location Picker (
 ) to choose a location for the new asset.
- If you have access to the Space Management application, click the map pin icon () to select a location from a floor plan drawing. *Note: If you do not currently have this application, please contact your Sales Representative or Client Services for more information.
- Click Save.
- If you have access to the Space Management application, click the map pin icon (
- All information and data that was added to the asset model will display on the asset, and cannot be changed.
- Enter as much additional detail as you have about the asset in the available fields on the asset form, such as the Barcode #, Serial #, or Tag.
- Click Save at the bottom of the asset.
Scheduled Work
If you added PM schedules to the model that this asset is created from, you must define the start and end date for those schedules.
- Click on the Scheduled tab.
- Click on the Sched# of the schedule you would like to define. The Recurrence window will open automatically.
- Enter the Start Date, or select it from the calendar. *Note: Regardless of the Start Date for the PM schedule, the first scheduled work order will generate on the next defined occurrence date. For example, if the Start Date of the PM schedule is 01/01/2020, but the PM schedule is set to recur every March 30th, no scheduled work order will generate until March 30th.
- Enter an End Date, or select it from the calendar, if needed.
- Click Save.
